*
|
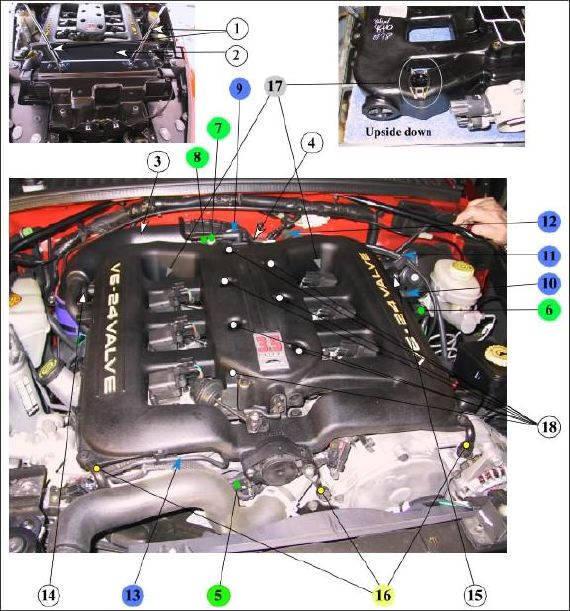
Disconnect negative (and positive) cable from battery
|
1
|
Remove front engine compartment supports
(bolts - 2 x 10mm, 2 x 13mm)
|
2
|
Remove upper radiator crossmember
(bolts - 4 x 13mm; nuts - 2 x 10mm)
|
3
|
Remove air cleaner intake duct
|
4
|
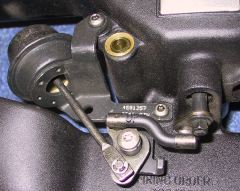
Remove throttle and speed control cables from the throttle
arm and bracket
(note: it was easier to remove the
bracket from the plenum first, in order to relieve the tension
on the cables)
(bolts - 2 x 8mm)
|
*
|
Disconnect electrical connectors from the following sensors:
|
5
|
Manifold Tuning Valve (MTV)
(note: we found that it was easier
to disconnect this harness at the very end, while lifting plenum
- after all other items were disconnected, and bolts/nuts removed)
|
6
|
Intake Air Temperature/Manifold Absolute Pressure (TMAP)
(bolts - 2 x T-20)
|
7
|
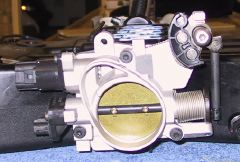
Throttle Position Sensor (TPS)
|
8
|
Idle Air Cntrol (IAC)
|
*
|
Disconnect vacuum hoses from the following:
|
9
|
Proportional purge solenoid
|
10
|
Speed Control Reservior
|
11
|
Brake Booster
|
12
|
Positive Crankcase Ventilation (PCV) Valve
|
13
|
Secondary Runner Valve (SRV) Solenoid
(note: this remains attached to the
plenum until after plenum has been removed from the engine bay.
One end attaches to the diaphram on the underside of plenum and
is very difficult to reach while still in the engine bay)
|
14
|
Remove left side (Intake Manifold Support-Left Side) intake
manifold support
(note: you don't need to remove lower
bolts unless you intend to paint this support)
(upper bolt - 1 x 13mm; lower bolts
- 2 x 8mm, 2 x 15mm)
|
15
|
Remove right side (Intake Manifold Support-Right Side) intake
manifold support
(note: you don't need to remove lower
bolt unless you intend to paint this support)
(upper bolt - 1 x 13mm; lower bolt
- 1 x 15mm)
|
16
|
Remove support brackets at intake manifold front corners
and at MTV (Intake Manifold Supports-Front)
(upper bolts - left & right 2 x
10mm, middle - nut 1 x 10mm; lower bolts - 3 x 13mm)
|
17
|
Remove clips attaching EGR tubes to intake manifold
(note: these are tricky to remove,
you have to pull them towards the firewall)
(2 spring retaining clips)
|
18
|
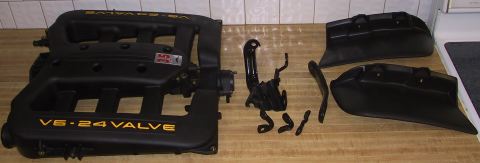
Remove bolts attaching intake manifold and remove manifold
(Upper Intake Manifold)
(bolts - 7 x 10mm)
|