A Portable Laptop Configuration
If you wish to build a system for transfering your DAT collection to lossless WAV files, an old desktop PC with a SCSI card would be the first thing that comes to mind. Below, I present a configuration using a laptop. The main advantages are size and portability. Much of this information can be applied when building a desktop PC system.
I freely provide these instructions so that you can build your own system for transferring audio from your DAT collection. You do this at your own risk. I take no responsibility for mishaps.
NOTE: The necessary hardware hasn't been manufactured in many years. You will be buying used items. The DDS drives in particular may have seen many hours of use for computer backup (which is what they were designed for). The most likely source for the hardware is ebay. Sometimes you can find the laptop and SCSI card on Amazon. Be sure that you can return, or get a refund on any defective hardware. Some ebay sellers are asking hundreds of dollars for a CTD8000 drive. This is far too much for a used drive that has who knows how much wear on the heads and mechanism. BTW, don't tell the seller that you are going to use the drive for audio. It will only drive the price of the drives higher.
Things you will need
- Someone who is familiar with computers. Someone who knows about old computers, DOS and SCSI drives is even better.
- A laptop computer that runs Windows XP and has a Cardbus slot. A Dell Latitude D830 or similar laptop will do nicely. You'll want a minimum of 2 GB of RAM. Of course, it also should have a hard drive installed. You can optionally use a small SSD (Solid State Drive). A 256 GB or smaller SATA SSD is what you need.
- The D830 laptop originally came with Windows XP Pro installed. If you need to reinstall Windows XP, you can download the Dell CD image from Internet Archive: Dell Windows XP
- Device drivers for the D830 can be downloaded from Dell. On the Support page, enter the Service Tag number (product identifier) to download drivers for your specific laptop: Dell Support
- An Adaptec SlimSCSI 1480 SCSI interface card with the old-style 50-pin SCSI cable (not HD50). The 1480 is Cardbus, which is faster. A 1460 PCMCIA card will work for reading a tape, but is too slow to play audio without stuttering. Also, a 1460 card will not read from two DDS drives at once. In either case, if you get the boxed kit, it will have the cable you need. You won't use any of the software that comes with the kit. NOTE: Windows XP is used because the 1480 SCSI card is not supported under Windows 98. The older 1460 SCSI card is supported under Windows 98, but as mentioned, it does not work well playing audio, and won't support two DDS drives at the same time.
- One or two Seagate CTD8000 DDS2 DAT drives. Some Sony SDT-9000 drives will also work, but only the early revisions. There were also reports that the Sony drives were more likely to have read errors. Best to stick with the CTD8000. Try not to buy the older Archive or Conner branded drives (Conner bought Archive, Seagate bought Conner).
- A case and power supply for the DDS drive. If you are lucky, you may find a CTD8000 in the OEM external case with power supply (picture below). It is more likely that you will find the bare CTD8000, mounted in a 5.25" bracket, with the wide 5.25" faceplate. An alternative is to buy a new case that is made for 5.25" SCSI drives. These are available for $100-$200, and can hold one or two drives.
- One or two AC power cords for the drives, depending on which type of case you installed them in.
- One SCSI terminator. This fits onto the back of the DDS drive case. It is needed to terminate the chain of SCSI devices. If using two separate drives, the terminator goes on the drive furthest from the SCSI card in the computer.
- If using two separate DDS drives, you will also need an external SCSI cable, to connect the two drives. The SCSI cable that came with the Adaptec 1480 SCSI card connects to the first drive, this additional cable connects the two drives, and the terminator goes on the last drive.
- The program Rufus, to copy the Windows XP CD image that you downloaded, onto a USB flash drive. This is only used if you reinstall Windows XP on the D830 laptop. Of course, you could alternately burn the image to a CDR, if you still have that capability.
- Adaptec ASPI 4.6. Install this on the laptop. Some software needs this.
- The Seagate firmware flash program, FUP (save this for later).
- The special firmware that allows the CTD8000 to read/write audio (unzip this for use later). Note that with this firmware, the drive can still be used for data backup.
Configure the Drives
Each DDS drive needs the DIP switches on the bottom set as shown in this picture.

The jumpers on the back of each DDS drive need to be set as shown in this picture.
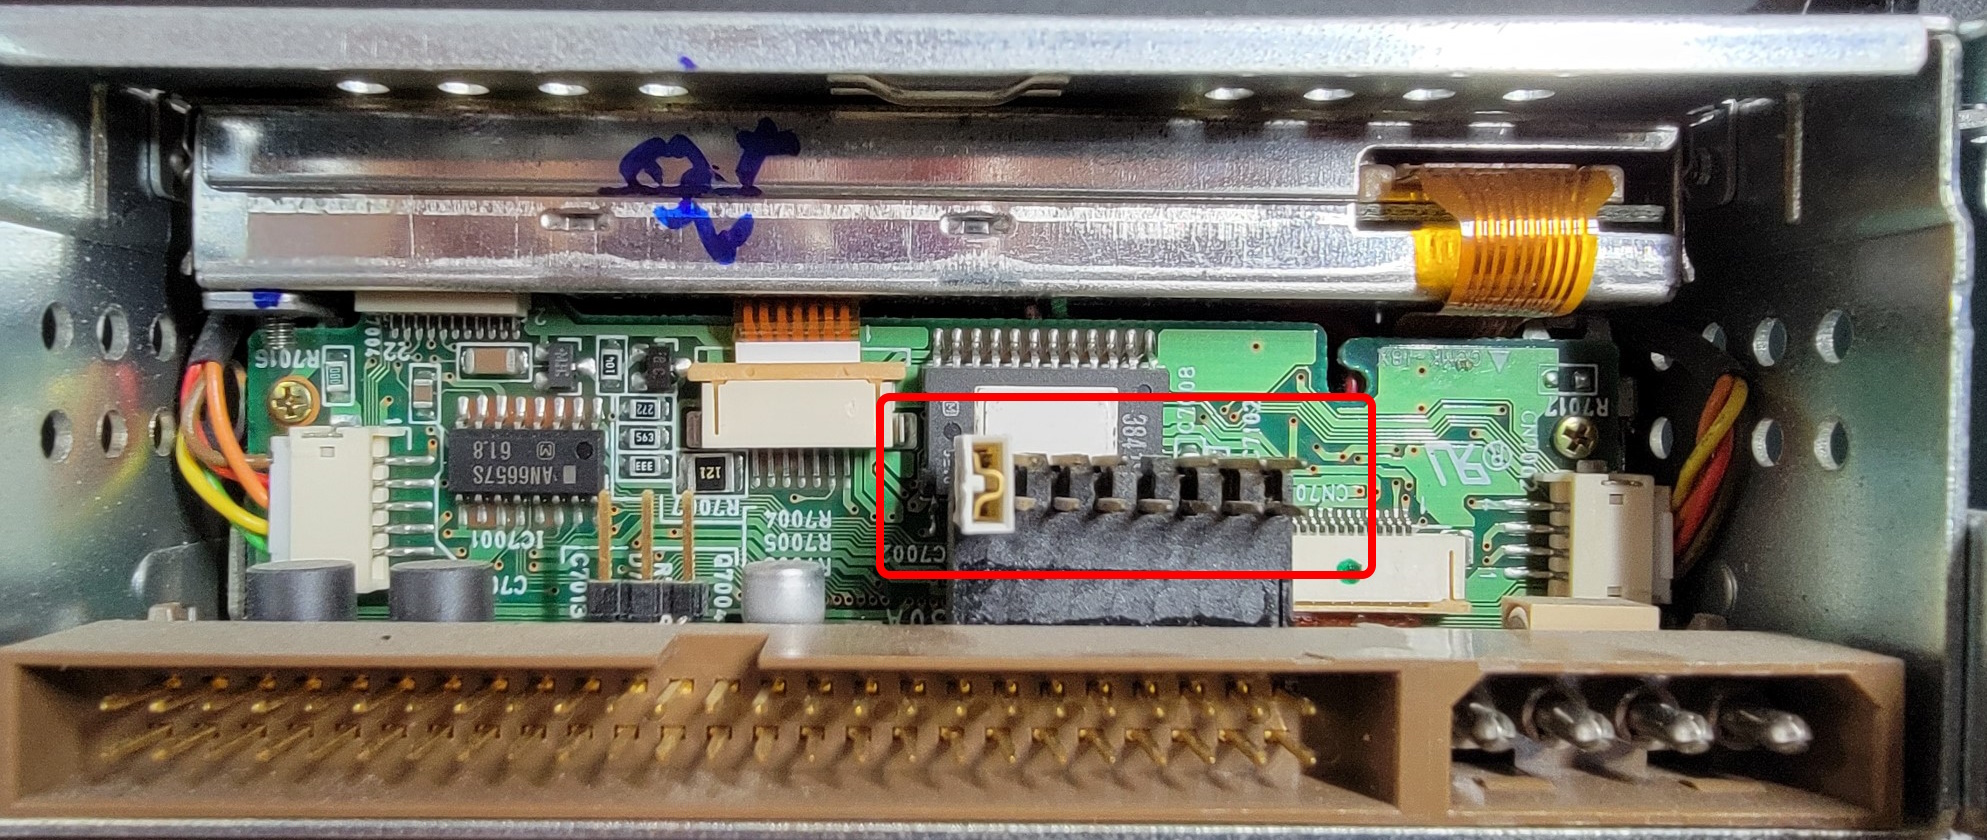
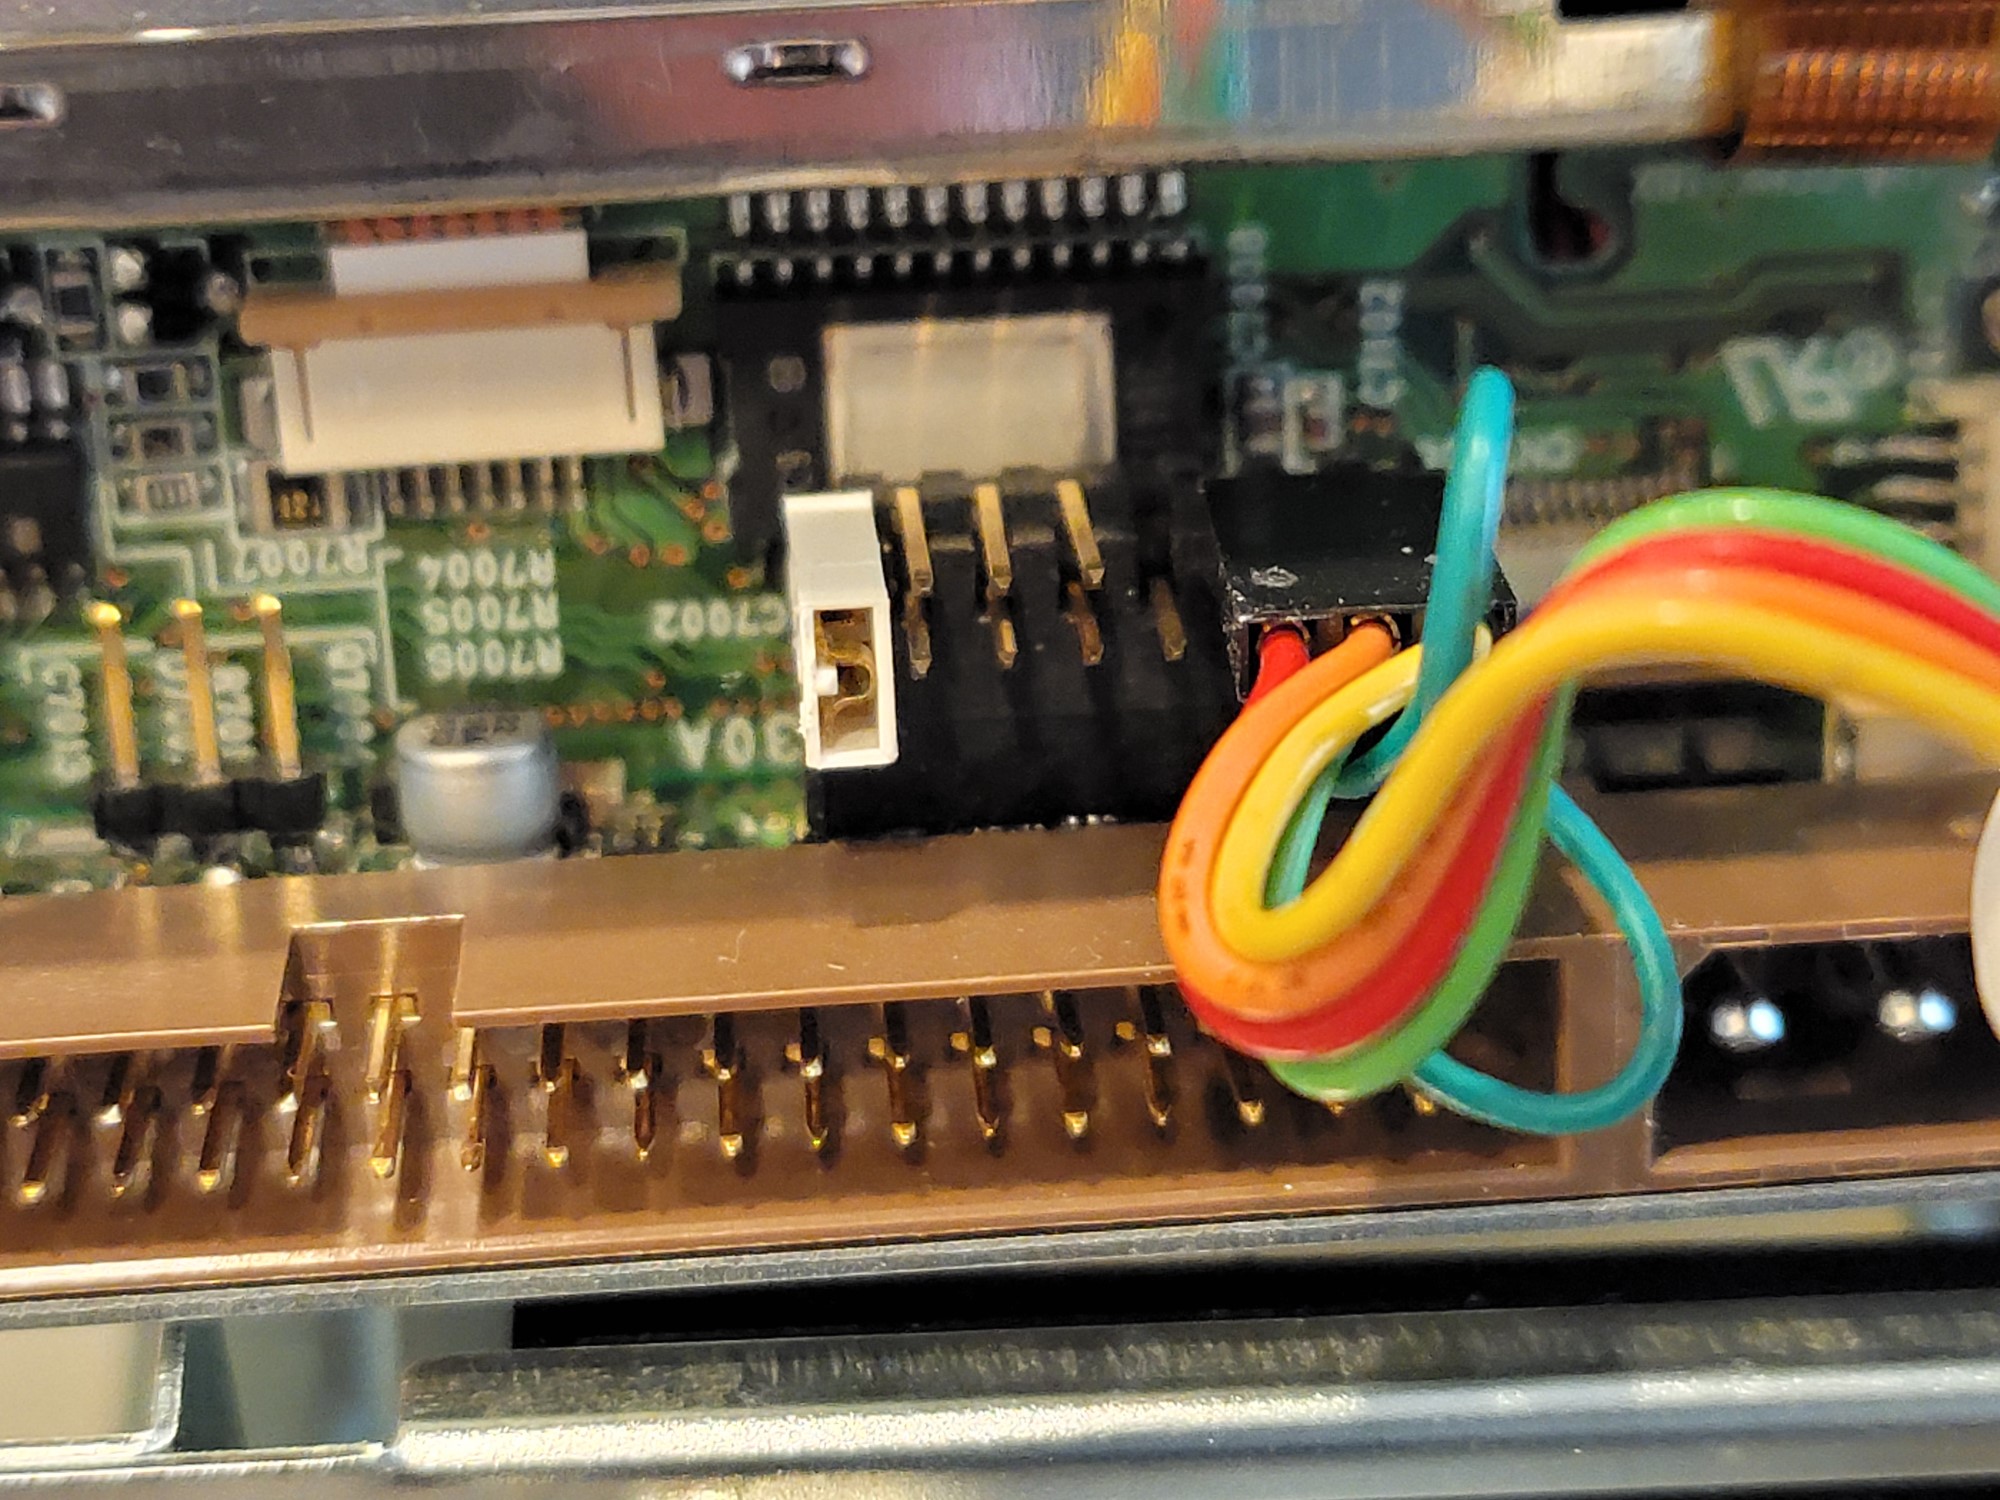
The SCSI ID switch on the back of the case plugs onto the rightmost three pairs of jumpers on the back of the drive as shown. The ground pins are on the bottom.
If using two DDS drives, you must set the SCSI ID switch of one drive to ID 2, and the other drive to ID 5. If only one drive, set it to ID 2. Make sure to do this before flashing the audio firmware.
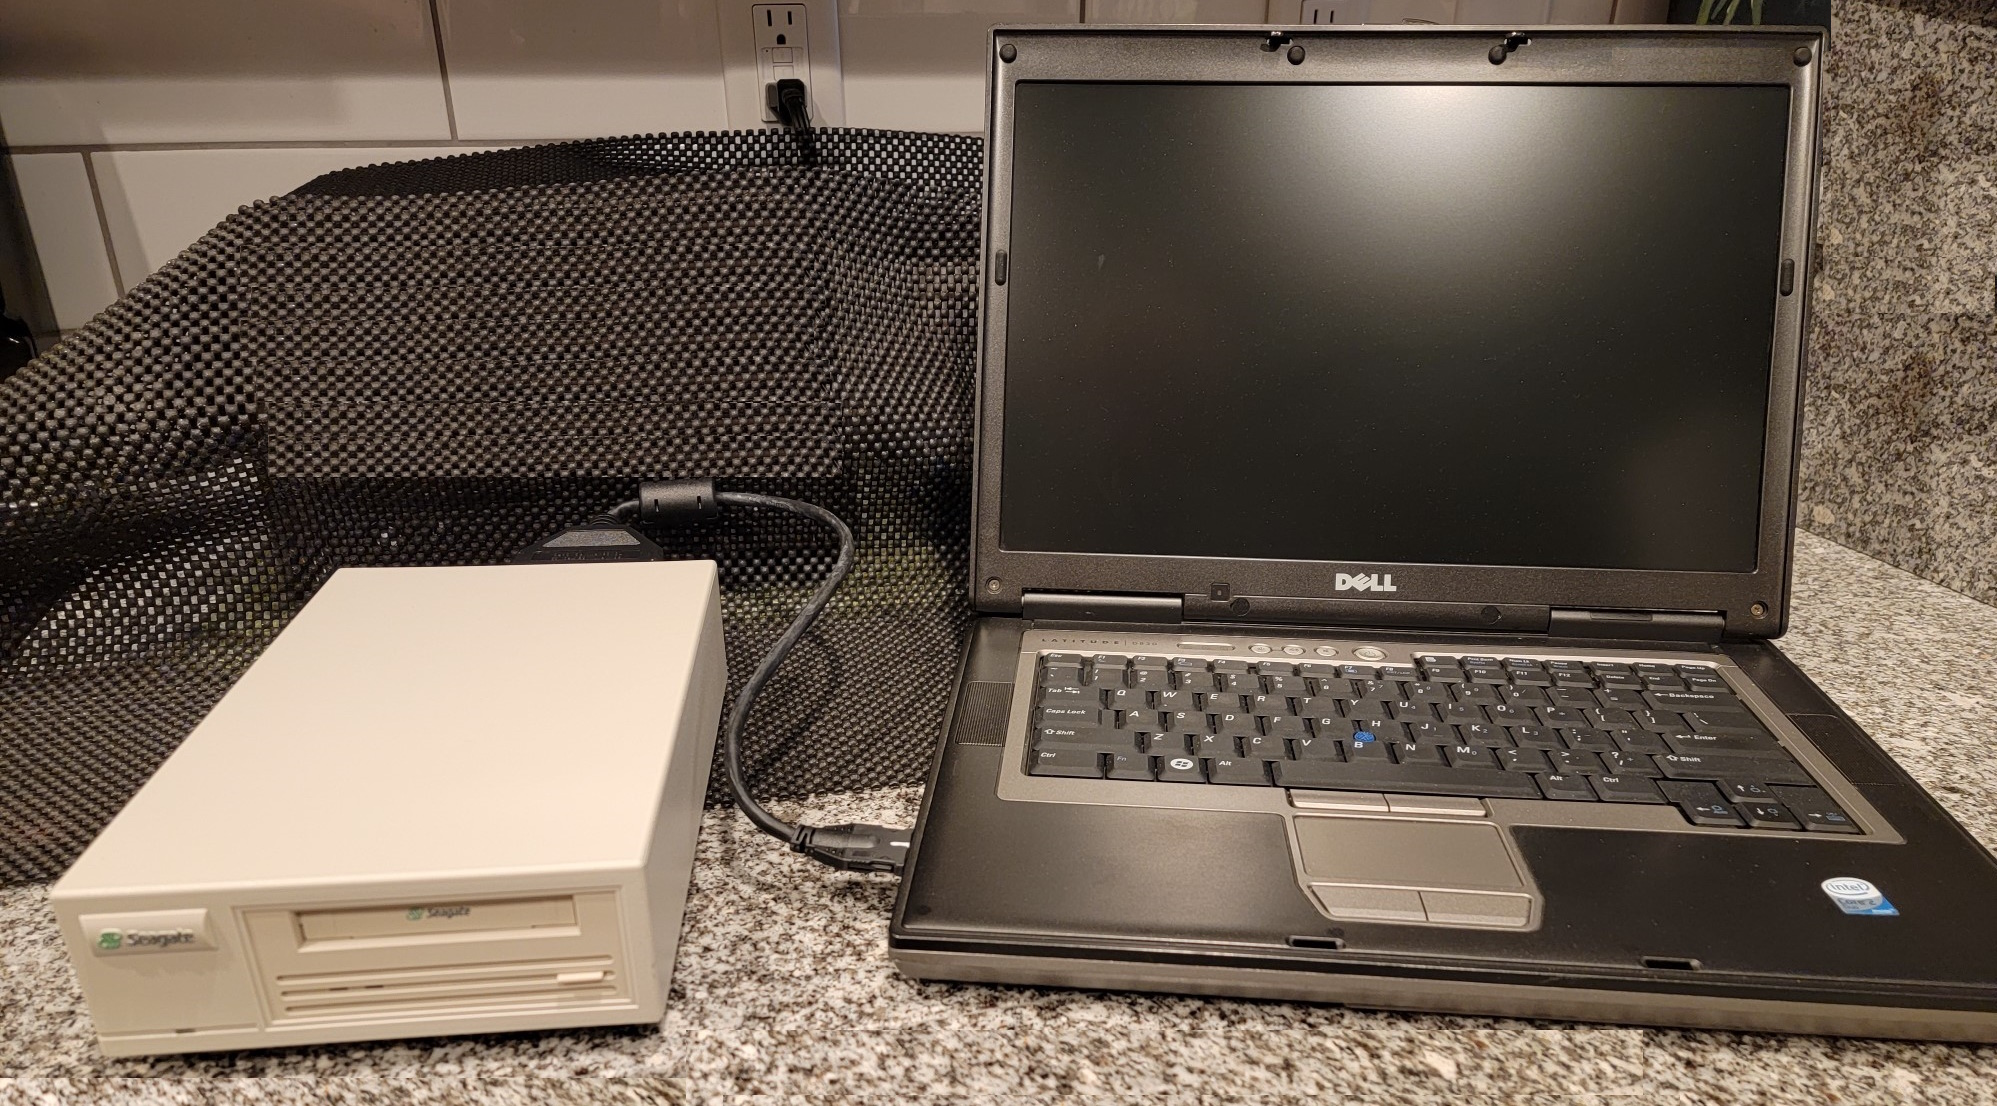
For the following instructions, your laptop and DDS drive should be connected as shown.
Flash the Firmware
At this time, flashing the audio firmware does not work with Windows XP, or with the 1480 Cardbus SCSI card. The traditional way to flash the firmware is to use a PCI or ISA SCSI card in a desktop PC, and boot to DOS with the device driver for the SCSI card loaded. See this page: Audio on a Computer DAT drive. This is the only drawback to the laptop configuration. Once the DDS drives are flashed with audio firmware, they work fine on the laptop with Windows XP.
I have been able to flash the firmware using Windows 98SE on an older laptop, using a 1460 PCMCIA SCSI card, without needing the DOS SCSI driver. The following instructions worked for me under Windows 98SE.
- With everything powered off, insert the Adaptec SCSI card into the PCMCIA slot of the laptop.
- Plug the SCSI cable that came with the Adaptec card into the card, and into a DDS drive (do one drive at a time).
- Plug the SCSI terminator onto the empty connector on the back of the DDS drive.
- Plug an AC power cord into the DDS drive.
- Power on the DDS drive first, then the laptop.
- After a few minutes, Windows will have installed a device driver for the SCSI card.
- Open Device Manager, and you should see the SCSI card listed, with a device driver installed. You should also see the DDS drive listed, but with no device driver. This is normal. A driver is only needed if you want to use the DDS drive for data backup.
- Open a DOS window and change directory to where you copied both the firmware flashing program fup.exe, and the audio firmware file V5acb-15.hex.
- Type the following command to flash the audio firmware onto the DDS drive: fup v5acb-15.hex /force (there's a space before the v and the /). Don't interrupt the process. In a few minutes, it will inform you when it is done. If it takes a very long time, either you have done something wrong, or the drive is defective. If this happens, the drive is now most likely corrupted and unuseable. You can try flashing it again, but don't hold your breath.
- Power down both the DDS drive and the laptop. The next time you power things on, the drive will be useable for reading/writing audio. Always power on the drive(s) before the laptop.
To flash a second drive, power down everything and hook up the second drive in place of the first. Repeat the steps above.
I am investigating further, to see if there is any way to flash the firmware with Windows XP and the 1480 SCSI card. I'll update this information if I find a way. If you don't have access to a DOS or Windows 98SE system with a working SCSI card, contact me about flashing a DDS drive for you.
Software
A few different programs have been developed by various persons to read/write DAT tapes in these DDS drives. Some are listed on my Links page. Some of these programs have disappeared over the years. For information on other possible options, email me.
Security
Windows XP is quite old, and no longer updated. It is not safe to connect your DAT audio computer to the Internet. If you do connect this computer to your local network for file transfer, make sure that it has no Gateway address, to prevent Internet access. Keeping it off the network, and using a USB flash drive or USB hard drive to transfer audio files is much safer.

